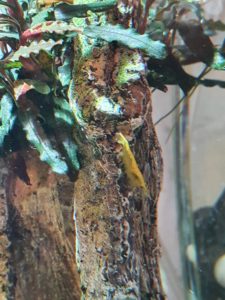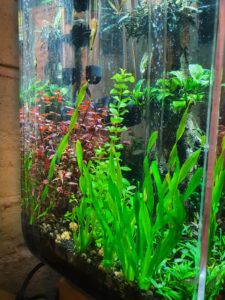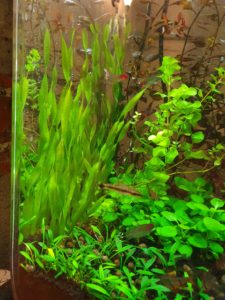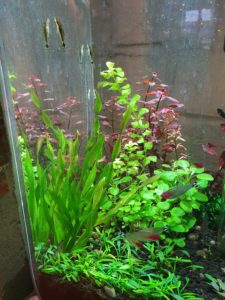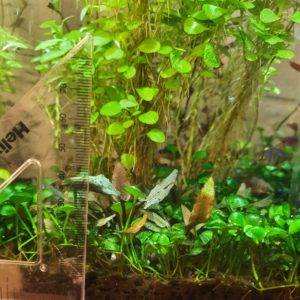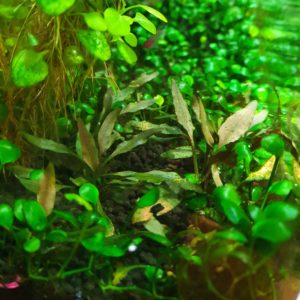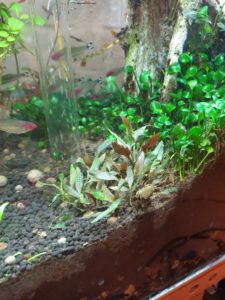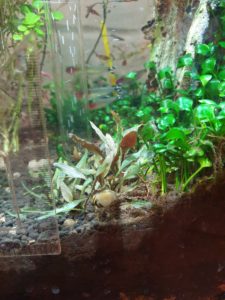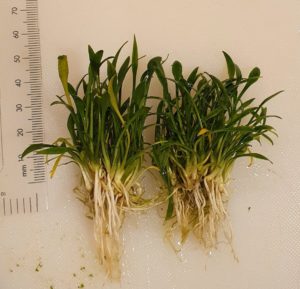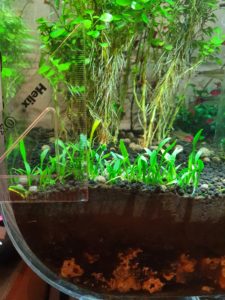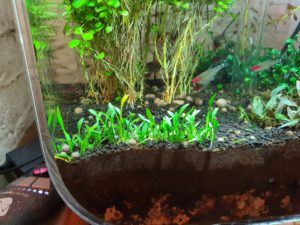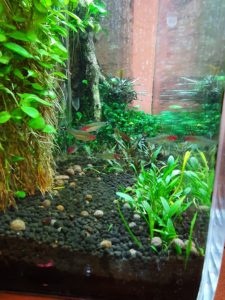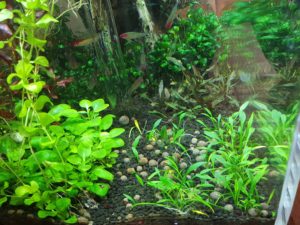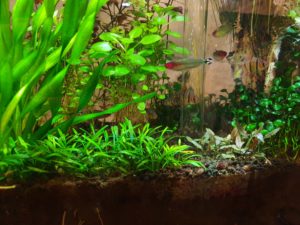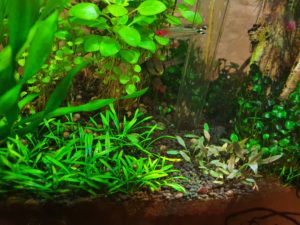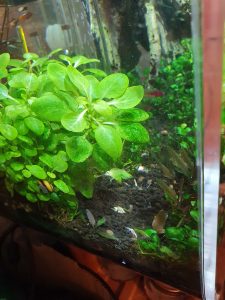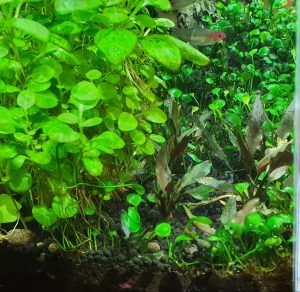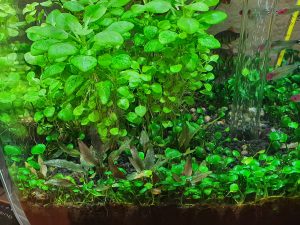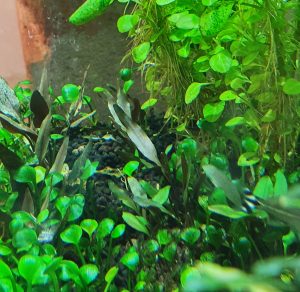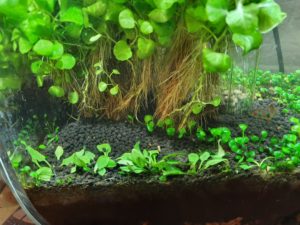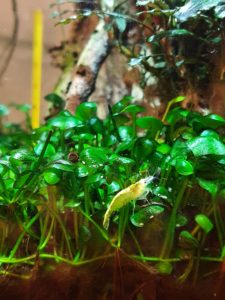
yellow goldenback shrimp hiding in marsilea
Hiding in marsilea

Neocaridina davidi are small freshwater shrimp and very popular for tropical aquaria.  These come in many different vibrant colours, most commonly a bright red usually referred to as ‘cherry shrimp’, but they can also be blue, orange, chocolate, white, black, green and several with alternating block patterns of colour.  Looking some something that would be easy to spot, I picked up seven bright yellow goldenback ones from Pro-Shrimp.  As is usual in the trade, there are no official designations and other names for these include Yellow Shrimp, Yellow Sakura, Yellow Fire Neon, Super Yellow etc.

I wasn’t sure how well live shrimp would travel in the cold weather, but they all arrived in just fine condition.  Although neocaridina can live in just about any type of water conditions, they can go into ‘shock’ when those conditions change so there is a drip acclimatisation method for getting them gradually used to new water chemistry.  I confess to having done a somewhat abbreviated version of this with maybe some slight trauma, but haven’t noticed any casualties.

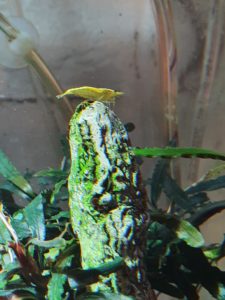
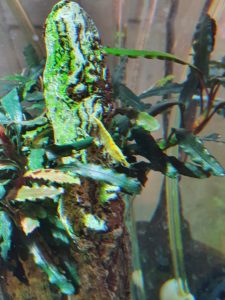
I thought these bright yellow shrimp would be easy to spot, but when they’re hiding they are not!  There are lots of great hiding places in the Fireplace Aquarium including a quite dense carpet of Marsilea hirsuta on the right side.  Word is shrimp can be quite shy for days or even weeks after being introduced to a new environment.  Usually I don’t see any at all but I did at one point several days after adding them see three at the same time so I’m pretty sure they’re mostly in there somewhere.  None of the fish or the amano shrimp either have ever taken any notice of the new yellow shrimp arrivals.

I wanted to get some more liveliness in the Fireplace Aquarium, but I’m cautious to not have excessive bioload in the tank where adding more fish could be questionable.  Shrimp are the perfect choice since they are ominvores and graze on detritus/biofilm without adding much (any?) bioload.  Neocaridina are reputed to be prolific breeders so we’ll see what happens to the population even though I’m taking no measures to attempt to optimise the water conditions for shrimp breeding.

Fish ate all the yellow shrimp!

Well crap!  At first it looked like everyone was getting along, but then I noticed some very suspicious tear-the-shrimp-apart behaviour from the barbs particularly.  I did then see what I think was a shrimp being torn apart; I think the barbs start it and then the rummys join in once the shrimp is pulled into the open.  Now there are none left; I’m pretty sure they’re not simply hiding.

I think this is a size thing.  The neocaridina as received were quite small, on the order of 1 cm or maybe even a little less, which I suspect triggers the “this is food” instinct in the fish.  The amanos however have always been completely unbothered by the fish, but they are also quite a big bigger.  Even the smaller male amanos are probably getting up towards 2 cm where I guess they can take care of themselves.  I might try some neocaridina adults to see if that flies.  Consensus on the interwebs seems to be that other than the completely benign otto catfish, all other fish are a risk to shrimp in at least some degree.
The newly planted vallis seemed to be doing poorly with the leaves suffering structural damage and since vallis is thought to be sensitive to damage from liquid carbon I stopped the daily dosing of EasyCarbo.  Stopping the daily liquid carbon is something I had been thinking about doing anyway, on the grounds that with injected CO2 gas the “carbon” part definitely wasn’t needed and I was never really sure whether the daily low dose EasyCarbo (1 ml / 40 L) was suppressing green spot algae at all.  That said, I did notice what seems to be increased aggressiveness on the part of the algae in the weeks after stopping the daily liquid carbon.  What do to?  I would like to give the vallis a fighting chance to get established…

Low phosphate does not prevent algae

Despite a lot of misinformation in the popular literature, reducing phosphate is not a way to control algae, in fact, the low phosphate will adversely affect the plants in the aquarium reducing competition for algae.  In any event, with estimative index fertilisation, none of the major fertiliser components, including phosphate, are ever limiting and it’s well established that “excess” fertilizers do not promote algal growth in aquaria.

Can high phosphate prevent algae?

There are some tantalising anecdotal reports that high phosphate can prevent algae.  I have been dosing weekly phosphate to 3 ppm, but I’m going to give 7 ppm a try and see if that has any kind of noticeable effect.  Since it was time to mix up a fresh batch of macro fertilisers, it was very straightforward to boost the phosphates by adding just a little more KH2PO4.  My current macro mix is made up to a total of 500 ml and dosed 10 ml per day on Saturday, Monday, Wednesday into a 40 L water volume tank.

Macro MixTsp / 500 mlg / 500 mlWeekly ppm
KNO32.75 tsp16.5 g9.6 K, 15.2 NO3
KH2PO41 tsp6.6 g2.8 K, 6.9 PO4
MgSO4 ⋅ 7H2O6.5 tsp33.15 g4.9 Mg, 19.4 SO4
K2SO43.75 tsp19.125 g12.9 K, 15.8 SO4

Overall, this works out to 25.3 ppm K, 6.9 ppm PO4, 15.2 ppm NO3, 4.9 ppm Mg plus whatever is in the tap water used for water changes, which also probably contributes a few more ppm phosphate.

Happy with higher phosphate

It’s been more than a year now since I increased phosphate to 7 ppm per week and happily, in all that time I have not had to scrape down the walls of the Fireplace Aquarium to remove green spot algae.  I can’t say for sure it is the increased phosphate that has made the difference, but before increasing phosphate the tank needed an algae scrapedown on a roughly monthly basis.  Interestingly, I do get green spot algae growth in the water condensation on the lid of the tank, but not in the water column which supports the idea that something about the content of the water column is the difference maker there.

I have made 7 ppm weekly phosphate part of my permanent estimative index fertiliser strategy.

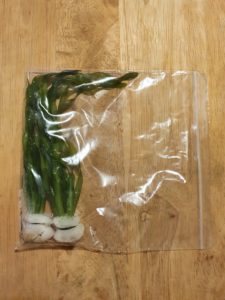
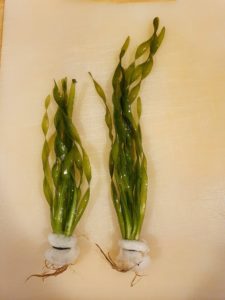
My wife suggested planting something “long and grasslike” so I straightaway thought of vallis.  There are several species of Vallisneria commonly available and I plumped for Vallisneria asiatica as sold by Aqua Essentials.  This is the second smallest vallis (Vallisneria torta being the smallest), and is listed as growing to 30 cm with pretty corkscrew twisted leaves that add interest.

I ordered two bunches, each of which came with four individual plants ranging in size from 18 to 23 cm.  These looked like they had been repacked from the original grower which I suspect was AquaFleur since the Aqua Essentials website picture is a match for the one in the AquaFleur catalog.  The idea is to make a “curtain of plants” up against the left side of the aquarium and whilst this was the original purpose for the Lysimachia nummularia ‘Aurea’, the lysimachia has proved to be too floppy to hold its upright position. I can say that upon planting the vallis, the otto catfish were immediately interested.

Vallis is considered a very easy plant to grow in aquarium, yet also has a reputation for being sensitive to liquid carbon. Initially I kept going with 1ml per 40L daily Easy Carbo I had always been using, but when the vallis showed signs of distress I stopped the treatment.  Stopping the daily dosing of liquid carbon is something I had been thinking about anyway for a while so this was a good excuse to try something new around fertiliser dosing.

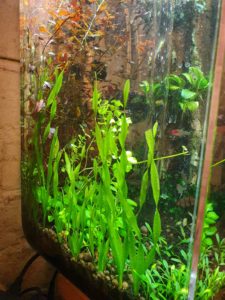
Vallisneria asiatica fourty-five day update

After fourty-five days in the Fireplace Aquarium there have been some significant changes in the vallis.  Several of the plants towards the back have melted completely away.  Others have had some partial melting as well.  That said, there also appears to be some significant healthy looking new growth particularly in the front plants. Now that I look at it more closely, I think all of the original leaves are going to melt and be replaced by new, darker green, more solid leaves.  Vallis does not grow emersed, so this is not a transition from emersed to submerged growth, yet different water parameters may have much the same growth state transition effect.

Vallis is reputed to like a lot of light and the plants at the back tend to get shaded by the fast-growing ludwigia.  I did cut back the ludwigia quite drastically recently (it doesn’t mind that at all) so there will be a few weeks with essentially full illumination across the tank which will give the vallis an opportunity to do some consolidation and maybe build some new-growth height.

They say Cryptocoryne lutea ‘Hobbit’ is a small crypt, but saying it and seeing it are two different things.  This is a really small crypt!  The original idea was to have a small plant to go in front of the Lobelia cardinalis ‘Dwarf’ to hide the rooty lower stems of the Lobelia without covering up the pretty bright green higher foliage.  The ‘Hobbit’ is listed as a maximum height of 5 cm which sounded about right, but now I think that’s too small.  The ‘Hobbit’ adapted to submerged growth easily, but after a good number of months still ranges from 2-3 cm in height.  Further, the dark brown/purple coloration of submerged form ‘Hobbit’ gets lost against the dark colour aquasoil making the ‘Hobbit’ hard to see.  To top it all off, the ‘Hobbit’ became overrun by the Marsilea hirsuta carpet, which is about as tall as the Hobbit and spreads much more aggressively.

I like the ‘Hobbit’ but I don’t think it’s fit for the original purpose in the spot.  Accordingly, I decided to try the “next size up” in crypts, Cryptocoryne parva.  That left open the question of what to do with the ‘Hobbit’ so I’ve moved the Hobbit to the front and centre of the tank.

Cryptocoryne species have a reputation for ‘melting’ if they get traumatised.  In this case they shed all their existing leaves and make it a do-over with fresh growth.  I’m hoping that doesn’t happen with these transplanted Hobbits.  The aquasoil only very loosely holds the roots such that there wasn’t much root tearing, and the replanting procedure was more a nestle-in-place rather than putting them in a hole and covering them with dirt.  I’ll keep them free of Marsilea invasion and the new venue has more illumination as well since it is more centrally located under the light and isn’t generally overshadowed by any of the taller species:  Lobelia, Ludwigia and Lysimachia.

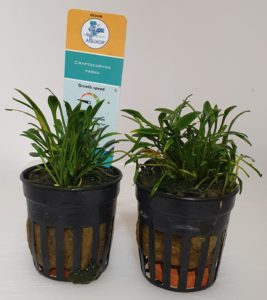
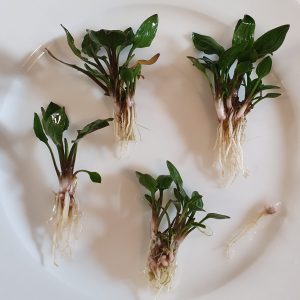
I picked up two pots of Cryptocoryne parva from Pro Shrimp as produced by Aquadip with the idea of putting in a crypt a little larger than the Cryptocoryne lutea ‘Hobbit’ in front of the Ludwigia palustris ‘Dwarf’.

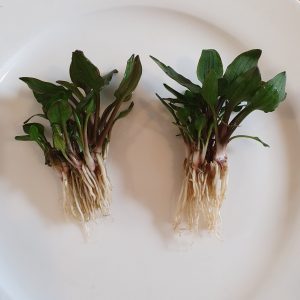
The pots arrived promply and in excellent condition.  It was straightforward to remove the rockwool growth support using pinsettes, and I was then able to tease apart the two substantial plant masses into many smaller plantlets for individual planting.

My first thought was to plant the parva amongst the pre-existing Marsilea hirsuta and C. lutea ‘Hobbit’, but that rapidly proved impractical so instead I removed a substantial portion of the marsiliea which really was growing a little rampantly out of control, and I transplanted the ‘Hobbit’ to the front-centre of the aquarium to clear the ground for the parva.

The parva planted easily in the cleared ground and made a neat row right across the front of the aquarium.  There’s still a lot of cleared space behind the parva which I’ll leave open for now.

One week update

Well… “I’ll leave it open for now” didn’t last very long as a concept.  I picked up three more pots of parva, and because Pro Shimp was sold out (I got the last two pots), this time the parva was grown by AquaFleur and sold locally by Aqua Essentials.  I thought these new parva pots weren’t quite as nice as the first two:  a little smaller and showing some touches of raggedness, but still good.  The new parva plantlets filled in some of the thin patches in the front row and let me extend the planting back into the empty space behind.  Whilst that was happening, I removed all the leggy Lobelia cardinalis ‘Dwarf’ and replanted the tops to fresh things up, which will also mean more light for the parva.  The new parva looks smaller in the aquarium because it was a little smaller, but also because I made an effort to plant it a little more deeply than the parva in front.  AquaDip claims a maximum height of 10 cm for the parva, whilst AquaFleur says 5 cm.  We’ll see how that shakes out in time.
 

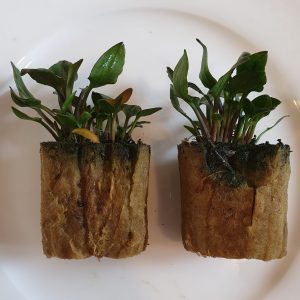
Cryptocoryne parva vs. Cryptocoryne lutea ‘Hobbit’
Emersed growth form C. parva vs. submerged growth form C. lutea 'Hobbit'
Emersed form C. parva vs. submerged form C. lutea ‘Hobbit’

For a long time, C. parva was the smallest available cryptocoryne but that changed in recent years with the introduction of C. lutea ‘Hobbit’ to the trade.  Here’s a comparison of the new C. parva emersed form plantlets with C. lutea ‘Hobbit’ plants that have been growing in the fully adapted submersed-form for at least three months.

The adapted ‘Hobbit’ is a dark brown/purple colour which is a strong contrast with the bright green colour of the emersed-form ‘Hobbit’.  The new parva is a similar bright green, but I expect the parva to stay roughly this same shade of green.  The maximum height of parva is listed as 10 cm, whilst the ‘Hobbit’ is listed as growing to 5 cm and indeed the new parva is already as tall as the ‘Hobbit’.  The eventual side-to-side comparison of the two will be interesting so hopefully the ‘Hobbit’ will emerge from its transplanting relatively untraumatised.

20 week C. parva vs. C. lutea ‘Hobbit’ update

After 20 weeks the parva has filled in nicely, but hasn’t gotten any taller – the leaves curve over so even at a length of 5 cm the height of the parva tops out at 3 cm.  The ‘Hobbit’ lists as being smaller than the parva and whilst this is true in terms of leaf length, the Hobbit leaves stand up straighter and also have an overall height of at most 3 cm.  Cryptocoryne parva has thin green narrow leaves – the emersed and submersed forms of parva look nearly identical – whilst the Hobbit has a wider bladed-shaped leaf in dark olive-brown.  These are both pretty great small crypts; personal preference might be the decider here rather than height and of course, you can have both!

We took a two week holiday and left the fish and plants in the Fireplace Aquarium on their own recognizance.  I did an 80% water change the day we set out, gave the fish a little extra food flakes, turned off the CO2 gas and otherwise left things as they were.  The fish, plants, fish and snails were all fine.  No casualties, and in fact everything was looking pretty good upon our return.  I had expected a huge algae problem to scrape off, but that was also fine.  Turns out these things are pretty robust.  You can buy “slow release” holiday food but I do not recommend doing that; for a couple of weeks, if everything is healthy when you leave, things will be ok upon your return.  Coming back, I gave the fish a slightly larger portion of food, did another water change, turned the CO2 back on and resumed EI fertiliser dosing.

Newly planted Cryptocoryne lutea 'Hobbit'
Before: emersed leaves cut off

Jurijs Jutjajevs’ (of Tropica) has a “pro tip” for avoiding ‘crypt melt’ and getting Cryptocoryne species more rapidly adapted to submerged growth in an aquarium:  cut off all the emersed form leaves when planting.  It’s quite a dramatic thing to get your new plants in from the vendor and then immediately cut all the leaves off, but I gave that a try with Cryptocoryne lutea ‘Hobbit’ and it’s time to report the results.

In the ‘before’ picture you can see the stumps of the newly planted row of ‘Hobbits’ to the immediate right of the Lobelia cardinalis ‘Dwarf’ and to the left of a mature row of fully adapted submerged form Hobbits up against the glass.  The idea is for the new plants to focus energy on developing submerged form leaves straight away since there are no residual emersed form leaves left.  Another upside is not having to clean up the decayed form of the emersed leaves as the plant transitions.

Cutting off Cryptocoryne ermersed form leaves really works!

Pre-trimmed Cryptocoryne lutea ‘Hobbit’ six weeks after planting

Jurijs’ tip worked beautifully!  The newly planted row of Hobbits have in just six weeks grown fully adapted submerged form leaves and are already more than half the size of the Hobbits planted six months ago that had the emersed form leaves left on.  The new Hobbits have adapted so well and so quickly that it’s hard to visually pick them out behind the row of older Hobbits.

Non-pre-trimmed Cryptocoryne lutea ‘Hobbit’ six weeks after planting

When the emersed form leaves are left on at planting, there are at six weeks a few fully submerged form leaves present, but most of the plant is still trying to give it a go with emersed form leaves.  That might be a good strategy in the wild where water levels might fluctuate above and below the plant, but it won’t work long-term at the bottom of an aquarium.

Great tip for all Cryptocoryne species (except Cryptocoryne parva)

Jurijs says the tip works for all species of crypts except for Cryptocoryne parva.  Parva doesn’t change its leaf form between emersed and submerged growth, so there’s no need to ‘help’ it transition.

Special note:  also don’t try this with Cryptocoryne species grown in tissue culture form.

disposable CO2 gas cylinder
Clarke 600 g disposable CO2 cylinder

I ran out of CO2 gas today for the Fireplace Aquarium and swapped out the old CO2 supply cylinder for a new one.  I get 600 g CO2 at a time in disposable cylinders used for MIG welding, and sure enough, the empty cylinder weighed 1200 g and the new cylinder weighed 1800 g.

End of tank dump

I few weeks ago, I noticed the CO2 bubble rate had increased substantially due to increased flow rate through the regulator on the CO2 tank.  Regulators are the first step in controlling aquarium CO2 and regulators work best when the pressure inside the CO2 tank is constant.  Most of the time is this easy because inside the cylinder the CO2 exists in both a liquid and gas phase in equilibrium, and so long as there is any liquid CO2 at all, the equilibrium maintains a constant pressure in the tank of around 860 psi.  When the CO2 is running out, however, there comes a point when there is no liquid remaining in the tank at which point the pressure of the gas phase CO2 gradually drops as it is exhausted.  Single stage* regulators “notice” the pressure in the supply cylinder is dropping and attempt to compensate by opening more fully, however they inevitably over compensate resulting in increased gas flow even though the source cylinder is at lower pressure.  In some cases this failure of regulation can happen quickly and dramatically and can “dump” all the remaining CO2 gas into the aquarium, poisoning the animal residents (the plants won’t be bothered however).

With my set-up the regulation failure is not so severe, and can be easily mitigated by awareness a problem might be coming and by adjusting the flow through the regulator down a little on a daily basis until the cylinder runs out gas completely.  I get more than three months of constant pressure CO2 and then a couple weeks of manageable instabiliy at the end.  I’ve set a 3 month reminder for myself to remind me when to start carefully monitoring the end of this new cylinder.

*Dual stage regulator alternative

A dual stage regulator is designed to maintain constant flow even if the source pressure changes and can avoid the end of tank dump that can happen with single stage regulators.  Dual stage regulators are much more expensive than single stage, can be easily and erroneously confused with “dual gauge” regulators, and don’t seem to be designed for the disposable CO2 cylinders I like to use.

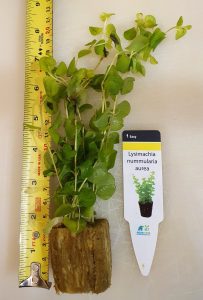
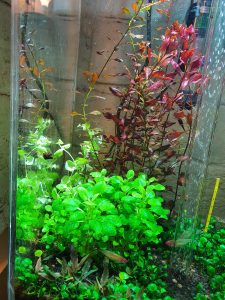
Golden creeping Jenny in an aquarium

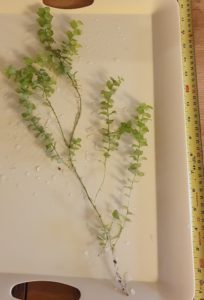
Also known as ‘moneywort’, the golden form of creeping Jenny came up in the weekly sales email from Aqua Essentials and even though I know impulse buying isn’t a good way to go with a planted aquarium, I was looking for a plant that gets to around 30 cm and the golden colour sounded appealing (and who doesn’t like 40% off list price?) so I picked up a pot.

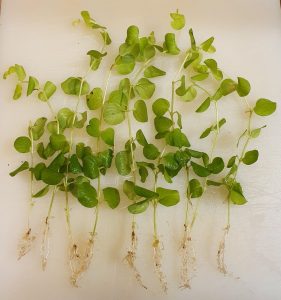
The first surprise was the large amount of emersed leafy growth – six inches.  I don’t have any experience with this plant so wasn’t sure whether the emersed growth would simply rot away when submerged in the aquarium, in which case prophylatic vigorous trimming might be in order, or whether as a marshy plant the emersed growth would be ready for full submersion.  I decided to trim off any obviously rotted portions and the lower leaves near the roots so I could plant the stems to good depth, but otherwise to leave the emersed growth in place; this can always be trimmed off later after planting if not doing well.

The second surprise was that after prising away the rockwool growth support, there were nine quite vigorous looking individual stems.  The catalogs never tell you how many individual plantlets to expect from a single pot and nine is on the high end in my experience.  With a good amount of stems, planting in a row up against a side wall of the aquarium aiming for a “golden curtain” type of effect seemed feasible, so starting at the back on the left side I planted in a forward row as close to the tank wall as reasonably possible.

I’m looking forward to seeing how this new plant behaves.  The Fireplace Aquarium has developed into a multi-coloured live plant display with various shades of light green, dark red, blue/green, dark green, darkish purple and whitish foliage, and now hopefully golden yellow.

Removing golden creeping jenny from the aquarium

Lysimachia nummularia 'Aurea' (golden creeping jenny) after 11 months
removed after 11 months

The golden creeping jenny never really got its feet under it in the Fireplace Aquarium.  Mostly for a very long time it sat there without any new growth at all – not dying but not thriving either.  The stems aren’t rigid enough to give upright growth but would swish around with the current, so the ‘golden curtain’ concept didn’t really work (there has been more success in this regard using Vallisneria asiatica).  After months and months of very modest progress, of all the stems initially planted ony one remained, but with this one the golden creeping jenny did seem to gain some growth momentum as it got towards the top of the tank.  This might reflect a high light requirement for this plant.  In any event, since the plant wasn’t behaving ‘on theme’ and not really thriving either, I removed the jenny and planted it outside in a planter box.  We’ll give this plant a go at a terrestrial existence.

How to avoid crypt  melt

I’m really liking the look of Cryptocoryne lutea ‘Hobbit’ in the front of the Fireplace Aquarium and it might be nice to put in a second row but it has taken this slow growing crypt more than four months to really get going.  Is there a way to speed up the transition from the emersed growth form of the plant as received from the shop to the submerged form it will take in the aquarium?  I previously noticed Jurijs Jutjajevs’ “pro tip” to simply cut all the emersed form leaves off and only plant the roots and crown of the plant.  Leaves that have already been removed can’t melt.  I wasn’t brave enough to try that last time, but this time, BRAVERY UNLOCKED.

Continue reading “Planting Cryptocoryne lutea ‘Hobbit’”