I use disposable CO2 tanks marketed for MIG (metal inert gas) welding that are filled with 600 g of liquid CO2. One of the challenges I’ve faced with injected CO2 gas in the Fireplace Aquarium is getting really precise control over the CO2 flow rate. The problem is that I need the CO2 gas flow rate in the aquarium to be approximately 6 ml per minute. Getting down from the high pressure in the CO2 cylinder to a slow steady controlled flow requires several steps of pressure reduction and control.

Regulators are the first step
The first step is a pressure regulator which connects directly to the CO2 cylinder and outputs a greatly reduced flow of gas. Usually measured in flow rate (rather than pressure), the output past the regulator is on the order of 5 to 10 litres per minute. That’s still way too much gas flow, so additional control is still needed.
Many people will have gas flow directly from the CO2 regulator to a needle valve to get the pressure all the way down to usable. Thing is, this turns out to be some pretty heavy lifting for the needle valve, particulary for a small aquarium that requires only very modest CO2 injection. Whilst it can in principle do the job, putting some fine control shaping around a thousand-fold pressure reduction is asking a lot with the needle valve needing to operate towards the very lowest end of its range, particularly in a small (less than 100 litres) aquarium. Small adjustments of the control knob can result in large changes of the bubble rate such that the line between “not enough CO2” and “way too much CO2” is tricky to navigate and the whole control system exhibits what might be described as “twitchy” behaviour. If this twitches upwards too much it can kill all the fish, so it’s some pretty serious business.

Add a secondary flow restrictor
Adding a secondary flow restrictor or pressure reducer between the regulator and the needle valve can mean that instead of requiring fine control around a 1000x pressure reduction, the needle valve might only need fine control around a 10x – 100x pressure reduction – still a challenge, but easier. An inexpensive method is to add a one-way pneumatic flow control valve with push in fittings.
The one-way flow valve has an adjustable knob on the top that can be tuned to throttle the flow of gas in one direction, as indicated on the body of the restrictor. Gas flow in the opposite direction is relatively unaffected by the restrictor. Be sure you install yours with the correct orientation! Some will come with a secondary locking ring to make sure the adjusted flow knob doesn’t move inadvertently. The push in fittings make for easy installation. Simply cut your CO2 tubing and push the two ends of the tubing into the restrictor for an easy leak-proof connection. If you need to remove the restrictor for any reason, pushing the blue collars in towards the body of the restrictor will allow the tubing to be released. Note that the indicated size of the push in fittings needs to be an exact match for the outer diameter of your CO2 tubing – don’t try to connect 1/4″ tubing to a 6 mm connection for example.
In my set-up I found the best results were with the flow restrictor clamped down to the maximum possible extent – the gas flow is never completely shut off with these restrictors. The needle valve had much better controllable adjustability with the secondary flow restrictor in place.
If you want to get really fancy about it, you can instead use a Mott porous metal flow restrictor which gives even better performance than the one-way flow valve.
Needle valves give precise control
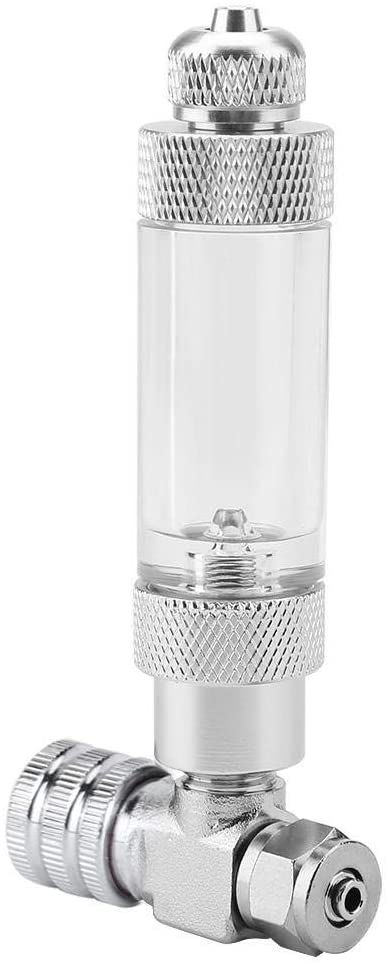
Precise control for the further pressure reduction is done by a needle valve which generally is the last control point before the CO2 enters the aquarium. There is a knurled knob used to control the flow rate and in this case also a bubble counter mounted on top of the needle valve to be able to visually monitor the CO2 flow. You fill the bubble chamber with liquid – I use glycerin so it won’t evaporate – and count the number of bubbles per minute you see rising through the chamber. With my setup, a bubble count of 120 bubbles per minute or maybe a little higher, pushed through the CO2 diffuser in the tank gives the right amount of dissolved CO2 in the water, as indicated by a drop checker.